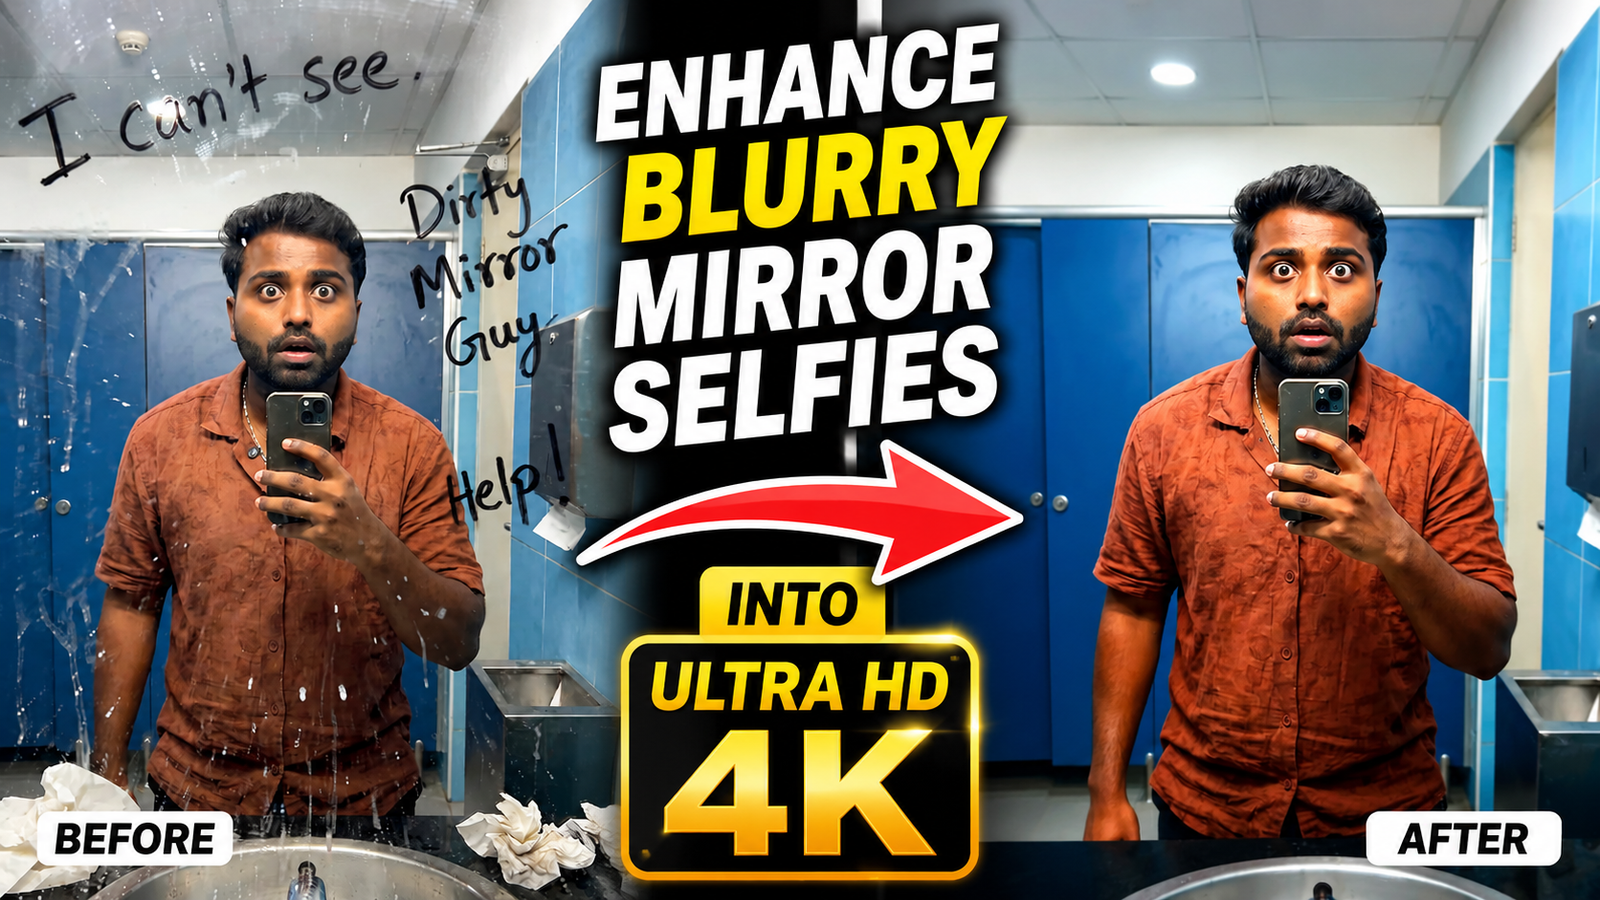
Upscaling can increase a mirror selfie’s pixel dimensions, but it cannot recover detail that the camera never captured. AI enhancement may estimate facial texture, hair, edges, or reflections; those additions can look convincing while being different from the original person or scene.
Identify the cause before editing. Motion blur, missed focus, a dirty mirror, low-light noise, compression, and digital zoom require different treatment. A badly out-of-focus face is usually better re-photographed than pushed through aggressive sharpening.
Work on a copy, correct exposure and white balance first, apply light noise reduction and sharpening, then upscale only to the size the final platform needs. Compare at normal viewing size as well as 100% zoom and reject changes that alter identity, text, jewellery, hands, or background objects.
Personal selfies can contain faces, room details, documents, screens, and location clues. Review an online enhancer’s retention, training, sharing, and deletion terms before uploading; local processing is preferable for sensitive images.
Related Resource
The Prompt link button above opens a Google Docs resource. A prompt can describe the desired edit but cannot guarantee authentic 4K detail or exact identity preservation. Remove private information and test on a non-sensitive copy before uploading a personal portrait to any AI service.
Diagnose motion, focus, mirror haze, and noise
Before enhancing, it helps to know what is actually wrong with the photo. Most mirror selfie blur comes from one of four issues: motion, dirty glass, bad focus, or digital noise from low light. AI tools can hide some of this, but not all of it.
Motion blur happens when your hand or body moves while the shutter is open. A dirty mirror scatters light and creates a hazy layer that no algorithm can fully remove. Autofocus sometimes locks onto the mirror frame or background instead of your face. Low light forces your phone to raise ISO, which looks like colored grain on skin.
Capture a cleaner source before editing
If you start with a less blurry photo, every enhancement looks more natural. These simple tweaks improve your base image before you ever open an editor.
- Clean the mirror with a microfiber cloth and a bit of glass cleaner. Smudges and water stains often look like focus problems.
- Add more light. Turn on every bathroom light, open the window, or bring a small lamp closer to the mirror. More light usually means less noise and sharper edges.
- Use the rear camera when possible. The rear camera usually has a better sensor. Use a timer and hold the phone slightly to the side so it still captures your reflection.
- Tap to focus on your face in the mirror and wait a split second for the phone to lock focus, then stay still while the shutter fires.
- Enable burst or live photo modes where available, then pick the least blurry frame in the gallery.
Evaluate privacy, controls, and export limits
Once you have your image, the next step is to enhance resolution and clarity. There are many AI upscaling apps in the Play Store and App Store. Features and privacy policies change over time, so check current reviews rather than trusting only marketing claims.
| Tool Type | Typical Use | Main Strength | Main Risk |
|---|---|---|---|
| Dedicated AI enhancer app | Quick face and selfie fixes | One tap smoothing and sharpening | May over beautify or distort features |
| Online 4K upscaler site | Large resolution boost on desktop | High quality 2x or 4x upscale | Uploads personal photos to remote servers |
| Pro editor with AI plugin | Creators who edit regularly | Fine control over sharpening and noise | Learning curve and possible subscription cost |
Look for apps that clearly explain where images are stored, and if cloud processing is used. Avoid APKs from random websites and stick to official stores. If a tool asks for permissions that do not match image editing, such as contact access, consider that a red flag.
A moderate edit-and-upscale workflow
Here is a simple three layer approach that usually gives the best result without making your face look artificial.
1. Fix exposure and color first
Open your photo in a trusted editor. Adjust brightness and contrast so your skin is not washed out or too dark. Reduce highlights a little if the mirror has glare. If your bathroom light is very yellow, use the temperature or white balance slider to bring skin closer to a neutral tone.
2. Protect identity and retain natural texture
Next, run the image through an AI enhancement tool or the portrait enhancement option in your chosen app. Start with the lowest strength setting. Focus on clarity around eyes and hair, not maximum smoothness. For some apps you can use a Face only toggle so the rest of the scene stays realistic.
3. Export to a required pixel size—not a quality promise
Finally, choose the upscale function. Many tools allow 2x or 4x enlargement. 4K roughly means 3840 pixels on the long edge. If your original selfie is already several megapixels, a 2x upscale often looks more natural than 4x. Save the result as a high quality JPG or PNG, then zoom in to check for plastic skin or halo lines.
Examples of recoverable and unrecoverable blur
Example one, a night time bathroom mirror selfie taken on an older Android phone. The original has grainy cheeks and a bit of motion blur in the hand holding the phone. After adding a desk lamp near the mirror for a retake, then running a soft AI enhancement and 2x upscale, the final image looks cleaner, and the grain is far less visible on Instagram stories.
Example two, a gym mirror selfie with harsh overhead lighting. The phone focused on the weights behind you, so your face is soft. In this case, even strong AI sharpening will only partly fix the blur, and might create strange outlines around eyes and lips. A better solution is to crop tighter, add some clarity, and re shoot next time while tapping to focus on your reflection.
Case study style scenario, imagine you are building a consistent look for your fashion Reels. You select five past mirror selfies: three decent ones and two very blurry ones. You run all five through the same AI enhancer and upscale them to 4K. During review, you notice the worst two still look like painted versions of you, especially around hair strands. You decide to keep the three good ones, and replace the other two with newly shot selfies using better lighting and rear camera focus. This is a realistic outcome: some photos are worth rescuing, and some are better as practice.
Over-sharpening, invented detail, and privacy mistakes
Many people push sliders to the maximum and end up with cartoon like skin. Strong noise reduction can remove pores and turn hair texture into a fuzzy block. This might look fine on a small phone screen, but it usually breaks down when someone zooms or views the photo on a tablet.
Another mistake is cropping too aggressively before upscaling. If you crop down to a tiny section then try to turn that into a 4K image, the app has very little real data to work with. A better approach is to upscale first, then crop moderately. Also remember that heavily edited photos may look different once social platforms compress them again.
Know when to edit and when to retake
You can enhance blurry mirror selfies into ultra HD 4K style photos, but the result depends heavily on how good the original shot is. Clean mirrors, strong but soft lighting, and careful focus give any AI tool a real chance to improve your picture without turning it into a painting.
Use trusted enhancement apps with conservative settings, fix exposure and color before sharpening, and only upscale as much as your image can handle. Accept that some photos will never look truly sharp, and spend your energy on capturing better ones instead of forcing every old selfie into 4K.
Common questions about selfie upscaling
Can I turn any blurry selfie into true 4K quality
No, AI can guess missing detail, but it cannot rebuild a fully out of focus face. Mild blur and grain respond well, heavy blur usually does not.
What resolution should I export for a 4K style image
A common target is around 3840 by 2160 pixels. Many apps label this as 4K or 4x upscale. Choose 2x or 4x based on your starting size.
Are AI enhancement apps safe for personal photos
Safety varies. Always check privacy policies and where processing happens. Prefer tools that state how long they keep uploads and if data is used for training.
Why does my enhanced selfie look too smooth
That usually comes from strong skin smoothing and noise reduction. Dial down the effect strength, or use a brush tool that softens only small areas.
Should I use filters before or after upscaling
Apply basic corrections and AI enhancement first, upscale, then add creative filters at the end. This order keeps filters from exaggerating artifacts.
Thank you for reading. If you found this guide helpful, stay connected with our blog for more tech tips, useful mobile apps, AI editing tools, and the latest digital photography updates.