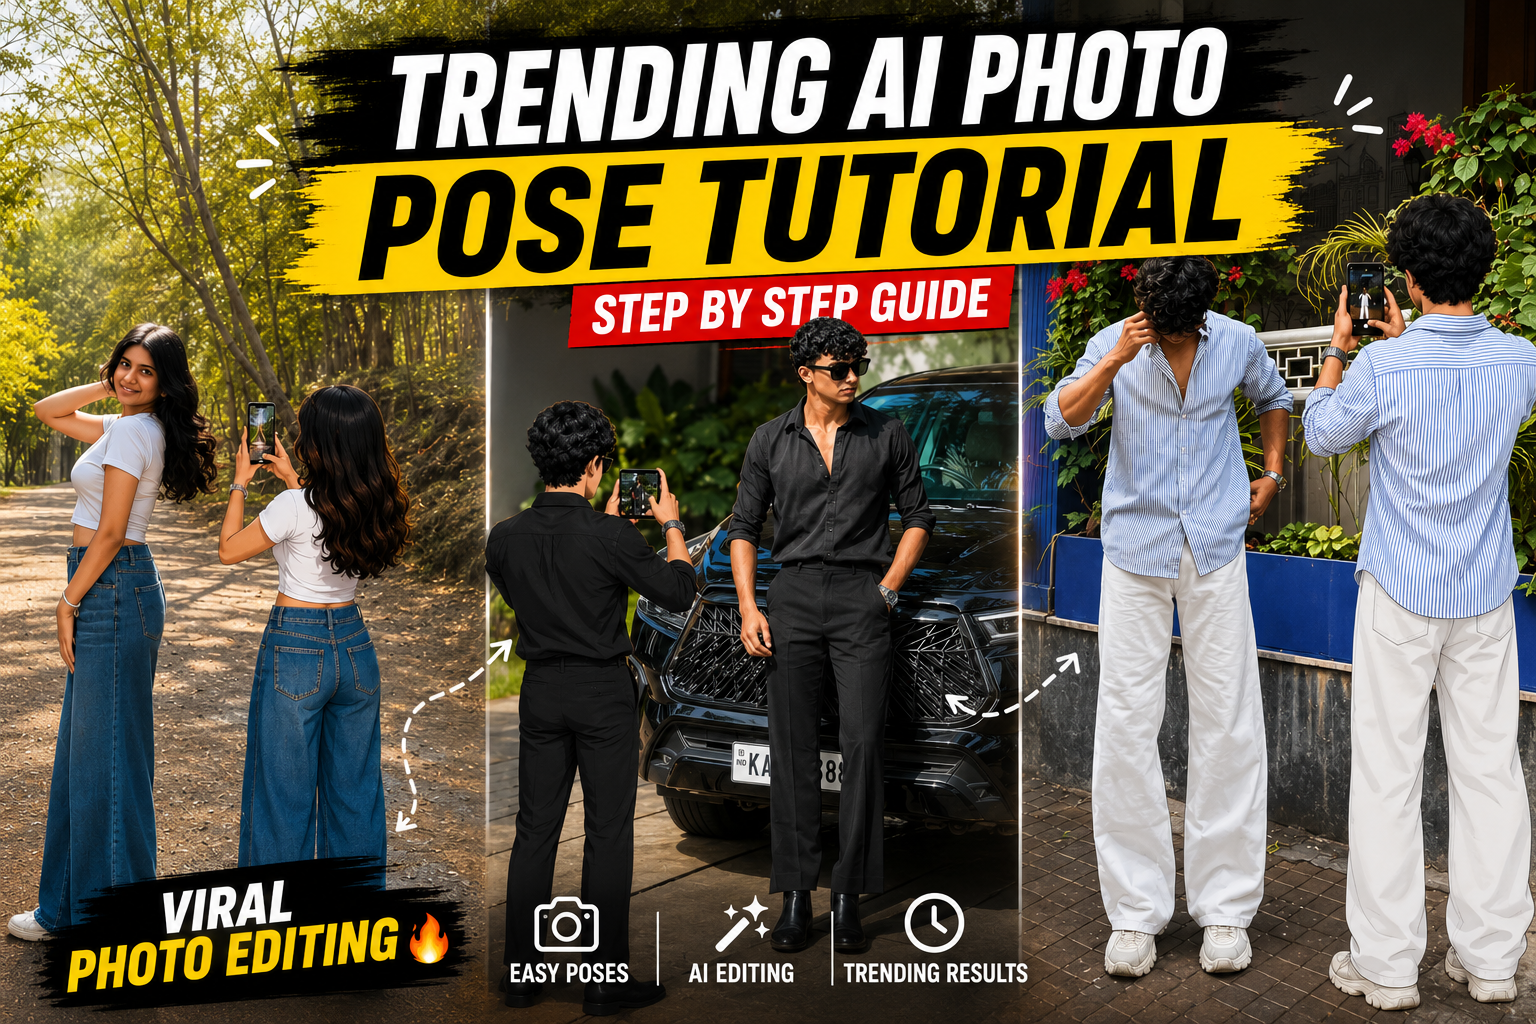
A good pose starts with light, camera height, and body position—not with copying a viral frame exactly. Use a reference to understand the direction of the shoulders, hands, gaze, and weight, then adapt it to the person, clothing, location, and intended crop.
Take a short burst of small variations instead of holding one rigid pose. Shift weight to one leg, relax the fingers, create a little space between the arms and torso, and turn the face gradually toward the light. These changes are easier to compare than ten identical shots.
A phone camera is sufficient when the lens is clean, the background is checked, and digital zoom is avoided where possible. Ask permission before photographing another person, respect location rules, and do not publish someone’s image without agreement.
The tutorial below gives a setup checklist, adaptable solo and group poses, practical examples, and a review process for selecting a natural-looking final photo.
Prepare the light, frame, and camera height
Most bad photos are not from bad poses, they are from bad basics. Before you try any trending pose, fix three things: light, frame, and camera height.
- Light: Stand facing a soft light source, like a window, cloudy sky, or shade. Avoid standing with harsh sun directly behind you unless you want a silhouette.
- Frame: Ask the photographer to leave enough headroom but not too much empty space. For full body, keep your feet visible and avoid cutting at the ankle.
- Camera height: For portraits, keep the camera around eye or shoulder level. For full body, just below chest level usually looks better than shooting from very high or very low.
Once these three are under control, almost any pose already looks cleaner, even if it is very simple.

Body-position principles that adapt to many poses
If you study trending poses from reels, magazine covers, or K drama posters, you will notice some repeated patterns. Learn these rules first so you can invent your own modern version.
External Resource
Small adjustments to test in sequence
- Angle your body: Turn your shoulders slightly away from the camera, usually 30 to 45 degrees. Straight on can look flat and wider.
- Shift your weight: Put more weight on one leg. This creates a natural S curve and avoids the stiff military stance.
- Hands doing something: Hold a bag, adjust your hair, touch your collar, or lightly touch your face. Idle arms pressed against the body often look heavy.
- Neck and chin: Gently push your face a little forward and slightly down. This keeps the jawline defined and avoids a double chin in photos.
These are the base, then you layer current trends like mirror selfies, overhead shots, or dramatic walking poses on top of them.
External Resource
Third-party WhatsApp link: This button opens a WhatsApp channel post. It is separate from this tutorial and is not required to follow the posing steps. Review the channel identity and privacy settings before following it or sharing personal information.

Choose a pose style for the intended photo
The table below compares some common classic poses with their more current version, so you can pick a style that matches your personality and platform.
| Pose Style | Classic Version | Trending Version | Best For |
|---|---|---|---|
| Solo standing | Both feet flat, arms by side, facing camera | Weight on one leg, one knee soft, hand in pocket or hair, body slightly turned | Outfit photos, street style |
| Selfie | Phone at chest height, face centered | Phone slightly above eye level, tilted, face off center, one hand in frame | Profile photos, stories |
| Sitting pose | Sitting straight, knees together, hands on lap | One leg stretched, one bent, torso twisted a little, elbow on knee or floor | Cafe shots, lifestyle posts |
| Couple pose | Side by side, both facing camera | One partner behind or slightly turned, playful interaction, foreheads or shoulders touching | Pre wedding, anniversaries |
| Group pose | One straight line, everyone same level | Layered heights on stairs or chairs, some people seated, some standing at angles | Friend trips, celebration posts |
Solo pose sequence with repeatable variations
This is a realistic workflow you can try on your next street or rooftop shoot. It matches many modern outfit and lifestyle posts.
- Stand at an angle with your left shoulder slightly closer to the camera, feet about hip width apart.
- Shift weight onto your back leg. Let the front knee bend a little so the leg line looks relaxed.
- Place one hand lightly in a pocket, on a bag strap, or holding sunglasses. Keep the elbow a bit away from the body.
- Use the other hand to play with your hair or hover near your jaw. Avoid pressing fingers into the face.
- Relax your mouth, then give a small smile or soft closed lips. Focus your eyes slightly beside the lens, not directly into it for a candid feel.
- Ask the photographer to take a short burst while you slightly rotate your head and shoulders. Tiny movements create more options without changing the base pose.
If any shot looks off, check the shoulders and hands first. Tension in those two areas usually ruins an otherwise nice pose.
Adaptable examples for common locations
Example 1: Mirror selfie at home
You want a trending mirror selfie but your room is small and cluttered. Clean a narrow vertical area of the background, move bright objects out of frame, and stand at a slight angle to the mirror. Hold the phone to cover part of your face, bend one knee, and slightly twist your waist. Turn your body toward the window so soft light hits your side. This simple setup often feels like a stylish influencer shoot, even in a basic bedroom.
Example 2: Cafe sitting photo
In a cafe, most people sit square to the table, hunch over, and then hate the photo. Instead, sit on the edge of the chair with your upper body slightly turned away from the camera. Cross one leg over the other or stretch one leg slightly forward. Place one elbow on the table and support your chin lightly, with fingers relaxed. Hold a cup in the other hand near your chest. Look just past the camera for a natural moment feel.
Improving a stiff group arrangement
Imagine five friends at a birthday dinner. The first attempt is everyone standing in one straight line, hands by sides, shoulders parallel to the camera. The image feels like an office photo, not a celebration.
To fix this with a trending style, do three adjustments. First, change the layout. Ask two friends to sit on chairs or the sofa, two to stand behind them, and one to slightly lean in from the side. Second, change hand activity. Give someone the cake, ask others to hold glasses, balloons, or to place a hand on a friend’s shoulder. Third, cue a simple action, such as everyone looking at the cake or at the person in the center instead of the camera.
The photographer then shoots several frames while people laugh or react. The final images feel much more natural, yet the pose is controlled and repeatable for any future event.
Pose, framing, and privacy mistakes
- Copying every detail from a reference without considering your own body proportions, outfit, or location. Use references as direction, not strict rules.
- Ignoring comfort. If a pose hurts or is hard to hold for a few seconds, it usually looks forced on camera.
- Over editing posture in apps. Extreme body reshaping can create strange lines and may look fake on closer view.
- Forgetting privacy. When shooting trendy street or mirror photos, check for strangers, personal documents, or screens in the background that should not be posted.
- Using only one angle. Many people stay stuck at eye level. Try low angle for power poses or slight high angle for cute or soft looks but avoid exaggeration.
Final shot-selection checklist
A good trending photo pose tutorial is less about memorizing dozens of exact shapes and more about understanding simple rules for angles, weight shift, hand activity, and eye direction. Once you control those four elements along with light and camera height, almost any outfit, room, or street corner can give you social ready photos.
Use this guide as a checklist next time you shoot. Start from a basic angled stance, add a natural action for your hands, adjust your chin and eyes, then experiment with one or two current trends like mirror frames, walking motion, or layered group layouts. Capture short bursts instead of single shots and you will end up with more keepers and less frustration.
Common questions about posing for photos
How do I know which trending pose suits my body type
Focus on poses where your weight is on one leg and your body is slightly turned. Test a few styles in front of a mirror, then save the ones that feel comfortable and repeatable. Comfort is a better guide than strict body type labels.
Which apps are good for practicing poses
Many Android and iOS pose apps provide sample silhouettes for men, women, and couples. You can also save Instagram posts or Pinterest boards into collections and practice those in front of a mirror before a shoot. Always install apps from official stores to avoid unsafe copies.
How can I pose naturally if I am shy
Start with simple actions instead of static posing. Walk slowly, look at your phone, adjust your jacket, or hold a coffee. Ask the photographer to shoot while you move so you are not thinking about every second.
What is the easiest trending pose for beginners
A relaxed standing pose works well for almost everyone. Turn your body slightly, put one hand in your pocket, bend one knee, and look slightly away from the camera. It feels casual but still looks intentional.
How many outfits or locations do I need for a good shoot
You can create several different looks from just one outfit and one location by changing pose, angle, and framing. Move from full body to close portrait, from standing to sitting, and from direct light to side light to get variety without overcomplicating the session.
Thank you for reading. If you found this helpful, keep following our blog for more practical tech tips, mobile photography guides, useful apps, AI tools, and the latest updates in the creator world.