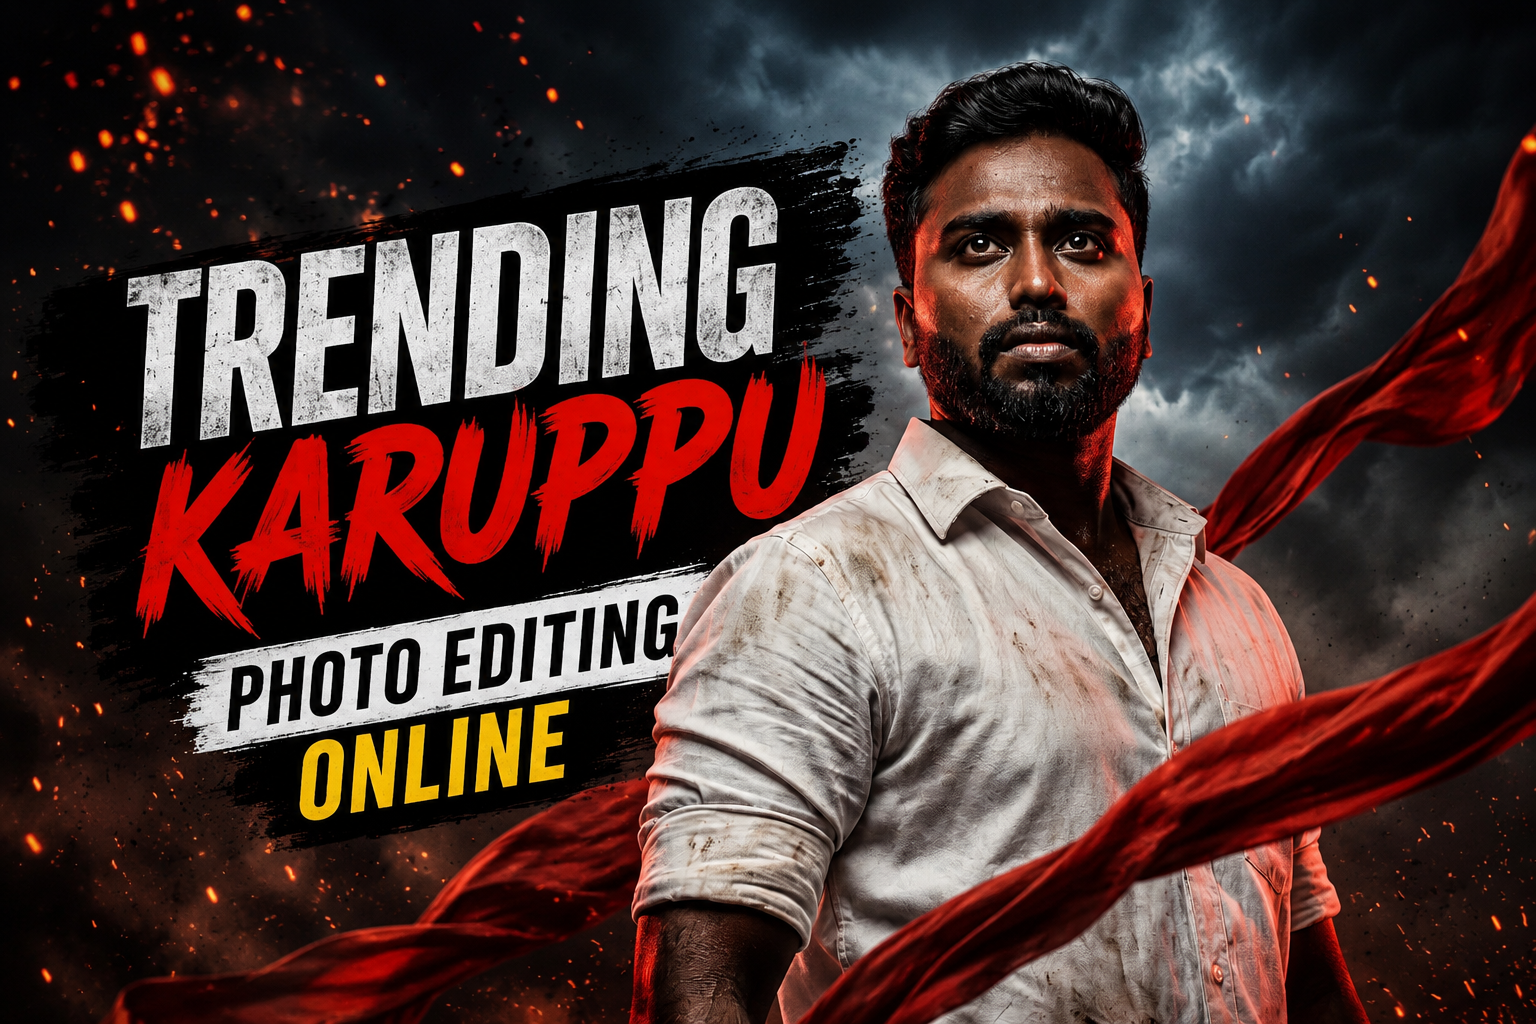
“Karuppu” commonly refers to a black or dark visual treatment, but there is no single technical preset that defines it. A usable edit keeps deliberate shadow detail, readable skin or subject tones, controlled highlights, and enough separation from the background for the intended phone screen.
This page contains two existing Alight Motion resources: a Google Play app link and a third-party preset/share link. The preset may change the project, require a compatible version, or include settings that do not suit every image, so duplicate the project and keep the original photo untouched.
Begin with exposure and white balance, then lower shadows gradually, shape contrast with curves, control individual colours, and check the face, hair, clothing, text, and background at normal viewing size. Heavy black clipping, aggressive sharpening, and excessive noise reduction usually remove useful detail.
The workflow below can be adapted in Alight Motion or a browser editor. App, preset, and free-plan behaviour can change, and personal photos should not be uploaded to an online service before its privacy and retention terms are reviewed.
DOWNLOAD NOW :-
CLICK HERE
Related Resource
Shared-preset disclosure: The DOWNLOAD LINK button opens an Alight Creative share URL supplied by a third party. It is separate from the Google Play app listing above. Review the destination, account request, project contents, and permissions before importing or editing.
Define the dark treatment before moving sliders
Karuppu simply means black or dark, but in editing it usually points to a specific mood. Backgrounds become very dark, there is strong contrast, and colors are limited, often with slight blue, green, or brown tones. Skin is still visible, but the overall feel is serious or cinematic.
Creators often mix this look with Tamil typography, smoky textures, light leaks, and grain. The risk is that everything becomes pitch black. Good karuppu style keeps some detail in hair, clothes, and eyes so the photo does not feel like a silhouette unless that is the exact goal.
A controlled dark-edit workflow
You can use many different tools for trending karuppu photo editing online, but the core steps stay similar. Here is a base workflow that works in most browser editors.
- Open your photo in the editor and duplicate the main layer if the tool supports layers. This protects the original.
- Crop slightly tighter than usual. Dark edits feel stronger when distractions are removed.
- Lower exposure just a little. Do not make everything dark yet. Use contrast and curves later for finer control.
- Increase contrast and lower brightness or midtones. Watch the subject face and keep it readable.
- Reduce highlights if the skin looks shiny, then darken shadows but stop when hair texture starts to disappear.
- Reduce saturation slightly and then add a bit of color through split toning or color balance to get the mood you like.
- Sharpen the subject and add very light grain for a cinematic finish if the editor has that option.
This simple pattern is enough for many social posts. Later you can add typography, smoke, or overlays as a separate step.
Choose an editor by curves, HSL, layers, and privacy
Below is a quick comparison of common browser editors that work well for dark edits. Features can change with updates, so treat this as a general guide.
| Editor | Best For | Key Karuppu Tools | Login Needed | Drawbacks |
|---|---|---|---|---|
| Photopea | Advanced users who like Photoshop style layout | Curves, layers, masks, blend modes | No for basic use | Interface can confuse beginners, more ads on free tier |
| Pixlr E | Intermediate users, quick social media posts | Adjustment layers, overlays, text | Recommended for saving projects | Some effects are paywalled, heavy on weak phones |
| Fotor Web | Simple one click style filters | Scene presets, basic curves, text | Usually yes | Less precise control, strong watermarking in some plans |
| Canva Photo Editor | Posters, quotes, story layouts | Filters, text, layout templates | Yes | Limited fine tone control, internet required for all work |
Example: retain face and hair detail in a dark portrait
Imagine you have a simple selfie against a cluttered background. You want a moody karuppu portrait for WhatsApp or Instagram DP.
Open the photo in Pixlr E or any editor with curves. Crop close around the face and shoulders. Use a blur or brush tool to soften the background slightly. Then open the curves control and pull down the middle part of the curve to darken midtones while keeping a small bend upward at the very end which preserves highlight on the face.
Next, lower saturation around 10 percent and add a blue tint to shadows using color balance or split tone. Increase contrast a bit more and apply a light vignette. This pushes attention to the face and gives the signature karuppu mood without losing eye detail.
Example: preserve text contrast in a dark poster
For a reel cover or Tamil quote poster, you often start with a full body photo or a side profile. The goal is to push the subject into a dark scene and then add bold text.
Upload the photo into Canva or Pixlr. First, use background removal if available or manually erase around the subject. Place the subject on a dark gradient background. Reduce brightness of the subject slightly, then add contrast and a subtle shadow under the feet or near the neck to keep realism.
Now add large white or yellow text on one side, and maybe a smaller line under it. Keep fonts simple so the dark mood stays strong. Avoid too many stickers or random colors, which kill the karuppu feel and make the design look noisy.
Recover an edit with crushed blacks and colour casts
Many readers share a common story. They try a YouTube preset, the background becomes black like a wall, but the face looks grey and muddy. This usually happens because the preset crushes shadows and lifts blacks too much while also desaturating skin.
The fix is careful local adjustment. In Photopea or Pixlr, add a new adjustment layer for brightness and mask it to only the face area. Raise exposure and slightly increase warmth only there. Then take the global curve and darken midtones again so the background stays powerful. This separation returns life to the subject without breaking the dark style.
Another mistake is exporting in low quality to save data. Dark photos show banding and noise very easily. Always export in high quality JPEG or PNG for your final post, then let the social platform compress once. Double compression often creates ugly blocks in dark gradients.
Photo privacy, preset, copyright, and export checks
When you use trending karuppu photo editing online you are uploading personal pictures to third party servers. Avoid sending sensitive documents or private family images to sites you do not trust. Check if the editor runs mainly in the browser or clearly states how images are stored.
Use official web addresses and avoid lookalike domains from random ads. Free editors often show pop up ads, so watch out for fake download buttons. If your browser warns about unsafe scripts, close the tab. For phone users, try to edit over Wi Fi because large images can eat mobile data quickly.
Export only after shadow and screen checks
Karuppu style is less about making everything black and more about controlling light and color to create mood. With one dependable online editor and a simple curve based workflow, you can build your own signature dark look without installing heavy apps.
Start with portraits first, then move to posters and reel covers. Save a few sample settings that work for your face and skin tone, and reuse them instead of chasing hundreds of random presets. With steady practice and attention to skin detail, your dark edits will look clean and intentional rather than forced.
Common questions about dark photo editing
Is online karuppu editing safe for personal photos
It can be reasonably safe if you use well known editors and avoid uploading very private images. Read the privacy section of the site and close unknown pop ups immediately.
Which online tool is best for beginners
Pixlr and Canva are beginner friendly because the interface is simple and presets help you start quickly. Later, you can move to Photopea for more control.
How do I keep skin tone natural in dark edits
Do not drop exposure too much globally. Use separate adjustments on the face, reduce saturation only a little, and add slight warmth to balance the dark background.
Can I create my own karuppu preset online
Many editors let you save adjustments as templates. Apply your favorite curve, contrast, and color balance, then use the save look or preset feature if available.
Why do my dark photos look noisy after upload
Noise appears when the original photo is already grainy or when you export at low quality. Shoot in good light, avoid heavy shadow lifting, and export at high quality before posting.
Thank you for reading this guide on karuppu style editing. Stay connected with our blog for more latest tech news, useful apps, AI tools, and fresh tutorials to improve your digital creations.